What Is VESA Mount 100x100? Pattern, Screws, and Fit
What is VESA mount 100x100: the 100 mm hole spacing, the M4 screw spec, how to confirm your monitor has it, and why the pattern says nothing about weight.
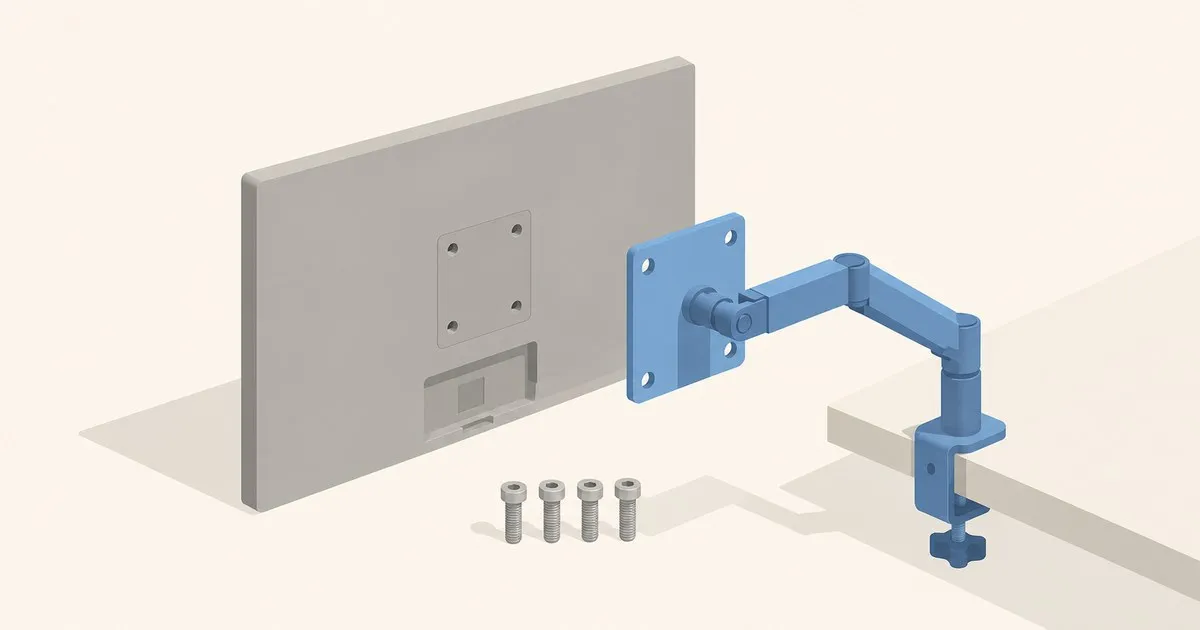
If you are asking what is VESA mount 100x100, the short answer is a square of four threaded holes on the back of a monitor, spaced 100 mm apart from hole center to hole center and cut for M4 machine screws. Any arm, stand or wall bracket whose plate carries the same four holes will bolt on. The name comes from the Video Electronics Standards Association, which publishes the mounting standard; the number is just the spacing. It does not tell you how heavy a panel the pattern can carry, which screw length you need, or whether your monitor has it at all, and those are the questions that cost money.
What “100x100” actually specifies
The document behind the pattern is the VESA Flat Display Mounting Interface, or FDMI. VESA’s overview of the standard splits it into parts by display size. Part D covers 12 to 22.9 inch displays weighing up to 14 kg (30.8 lb) and calls for a four-hole interface, center-mounted or edge-mounted. The 100 mm square is the larger of Part D’s two center-mount squares and 75 mm the smaller, which is why vendors abbreviate the class as MIS-D. Part E, for 23 to 30.9 inch displays up to 22.7 kg (50 lb), moves to six holes, and Part F covers 31 to 90 inch displays up to 113.6 kg (250 lb) with a multi-hole layout.
The standard defines geometry: hole spacing, thread size, and where the pattern sits. It does not certify the arm you buy, and it does not force a manufacturer to follow the size bands. Dell’s 27-inch U2719D carries a 100 x 100 mm pattern, per its user’s guide, despite sitting above Part D’s nominal ceiling, and Dell’s 49-inch U4919DW carries both 100 x 100 and 200 x 100 on one chassis, according to its guide. Screen size does not predict the pattern; only the spec sheet does. The other patterns and the adapters between them are in VESA compatibility explained.
How to confirm your monitor has it
Three checks, most reliable first:
- Read the manual’s specification table, not the marketing page. Dell’s guide lists the U2719D as “VESA 100 mm” and repeats the figure in the back-view diagram. “VESA-compatible” on its own is not a pattern.
- Look behind the stand. On many panels the holes sit under a plastic cover the stand latches into. The same guide has you remove the stand, then the four screws holding the cover. No visible holes does not mean no pattern.
- Measure center to center. 100 mm is 3.94 inches; 75 mm is 2.95 inches. Measure from the middle of one hole to the middle of the next, not edge to edge, and confirm the vertical pair matches.
If the back is smooth and the manual is silent, you are into bracket territory, covered in how to mount a monitor without VESA holes.
The screws: M4, and the length is the trap
The pattern uses M4 threads, a 4 mm metric machine screw. Dell specifies M4 x 10 mm screws for both the U2719D and the U4919DW, and 10 mm is a sensible default for a plain arm plate a couple of millimeters thick. Length is where installs go wrong:
- Too long and the screw bottoms out in the blind hole before the plate is clamped, so the monitor is loose on a screw that feels tight. Force it and you can crack the casing or the internal boss.
- Too short and only a thread or two engages, which holds until you first swing the arm.
- Adapter plates change the math. A 75-to-100 conversion plate or a spacer adds thickness, so the screw that fit the bare arm no longer reaches. Keep every screw length that came with the arm.
An M4 screw should start by finger and turn several rotations without resistance; if it binds on the first turn, the hole is a different thread or already damaged. Assembly order, including when the VESA plate goes on, is in how to install a monitor arm.
A pattern is not a weight rating
“Supports VESA 100x100” on an arm’s box tells you the holes line up. It says nothing about whether the arm’s spring can hold your panel where you leave it. Every arm has a rated range for monitor weight, and the number to check against it is the weight without the stand, which Dell lists separately for this purpose: 3.92 kg (8.64 lb) for the U2719D and 11.40 kg (25.13 lb) for the U4919DW. The U2719D guide also warns that a wall bracket must be listed for at least the panel’s load.
Three arms that all accept a 100 mm plate:
| Arm | Rated monitor weight | From the spec sheet |
|---|---|---|
| Ergotron LX single | 7 to 25 lb | 75x75 or 100x100, monitors up to 34 in |
| Humanscale M2.1 | 5 to 15.5 lb (2.3 to 7 kg) | flat-screen figure; curved panels 5 to 12.5 lb |
| Herman Miller Flo | 4.4 to 15.4 lb (2 to 7 kg) | up to 34 in flat or curved, 12-year warranty |
Figures are from Ergotron’s LX listing (Amazon Associates), Humanscale’s weight capacity table and Herman Miller’s Flo product sheet.
The 27-inch Dell at 8.64 lb sits inside all three ranges. The 49-inch Dell at 25.13 lb has a 100x100 pattern on its back and still fails every one of them, a fraction past the LX ceiling and well over the other two, which is why Dell steers it toward a 200 x 100 mount. An arm loaded near the bottom of its range floats upward and one loaded past the top sags, the drift problem covered in weight ratings and capacity explained. The fit checker runs both checks together.
Herman Miller’s sheet, note, describes the Flo head only as “VESA-compliant” and lists no patterns; the installation guide, not the brochure, is where those get documented. A higher price does not buy a clearer spec.
Why the pattern is worth caring about
The point of bolting a monitor to an arm is placement. OSHA’s computer workstation guidance puts the top of the screen at or slightly below eye level, the center 15 to 20 degrees below horizontal, and the screen 20 to 40 inches from your eyes, and says the support should let you change distance, tilt and rotation. A factory stand rarely reaches those numbers for a tall user or a deep desk; the 100x100 pattern is what lets you replace it with something that does. Whether an arm or a taller stand is the better route is argued in our monitor arm vs monitor stand comparison.
If you are mounting a monitor because of ongoing neck or shoulder pain, screen height is one input among several. Get persistent pain assessed by a clinician rather than treating hardware as the diagnosis.
Sources
Related

VESA Compatibility Explained: Mount Patterns and Adapters
This guide explains VESA mount patterns, arm compatibility, adapter options, screw fit, and the checks needed before installing a monitor arm.

How to Install a Monitor Arm: Clamp, Grommet, VESA
Install a monitor arm in the right order: check the desk, fit the clamp or grommet base, attach the VESA plate, hang the panel, then tension the lift.

How Much Does a Monitor Weigh? Weight by Size
Most 24- to 34-inch monitors weigh about 7–22 lb without a stand. Compare manufacturer-listed weights for real 24- to 49-inch models.